¶ Lots of explaining
When exporting a mesh you may have noticed all the different, seemingly non-sensical UV maps. UV 0 is what the textures are mapped onto and UV 1 (often) is the lightmap. When re-importing them into the Editor a lightmap is always auto-generated and you manually need to tell the Editor about a already existing UV map that should be used as the lightmap.
As an example I wil use SM_StnMunichHbf_Building_01.
To beginn with you'd want to check which UV channel really is the lightmap. Often this is UV 1, but it doesn't have to be. But as lightmaps usually don't overlap themselfes and usually don't have a U or V bigger than one, you can find out which one it is yourself. The keyword is usually, because the 3D modelers at DTG are really drunk and just create all sort of amazing models and mappings.
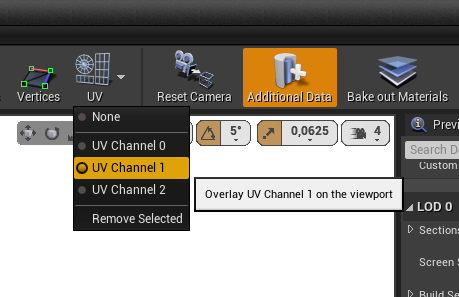
You can check out a UV channel in Editor via the Toolbar like this:
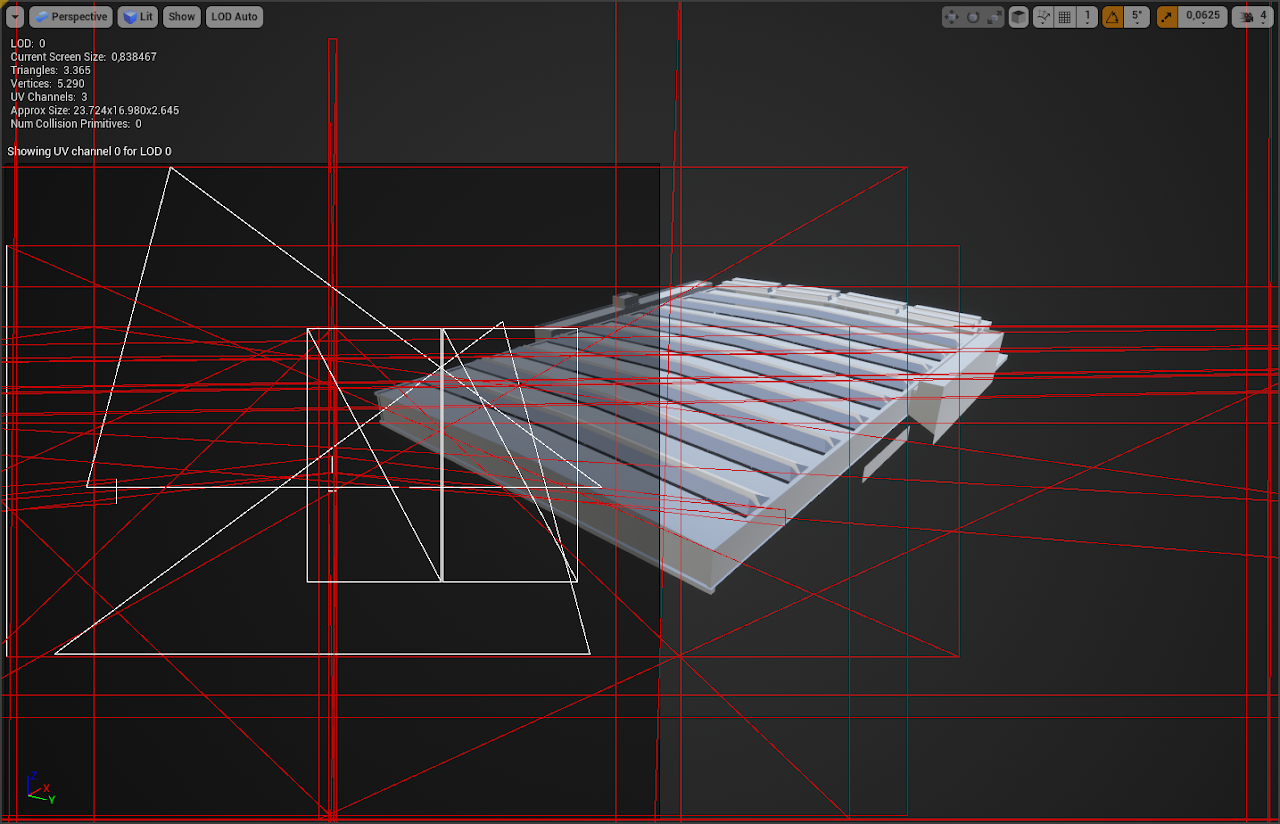
While UV 0 can look like a complette mess, ...
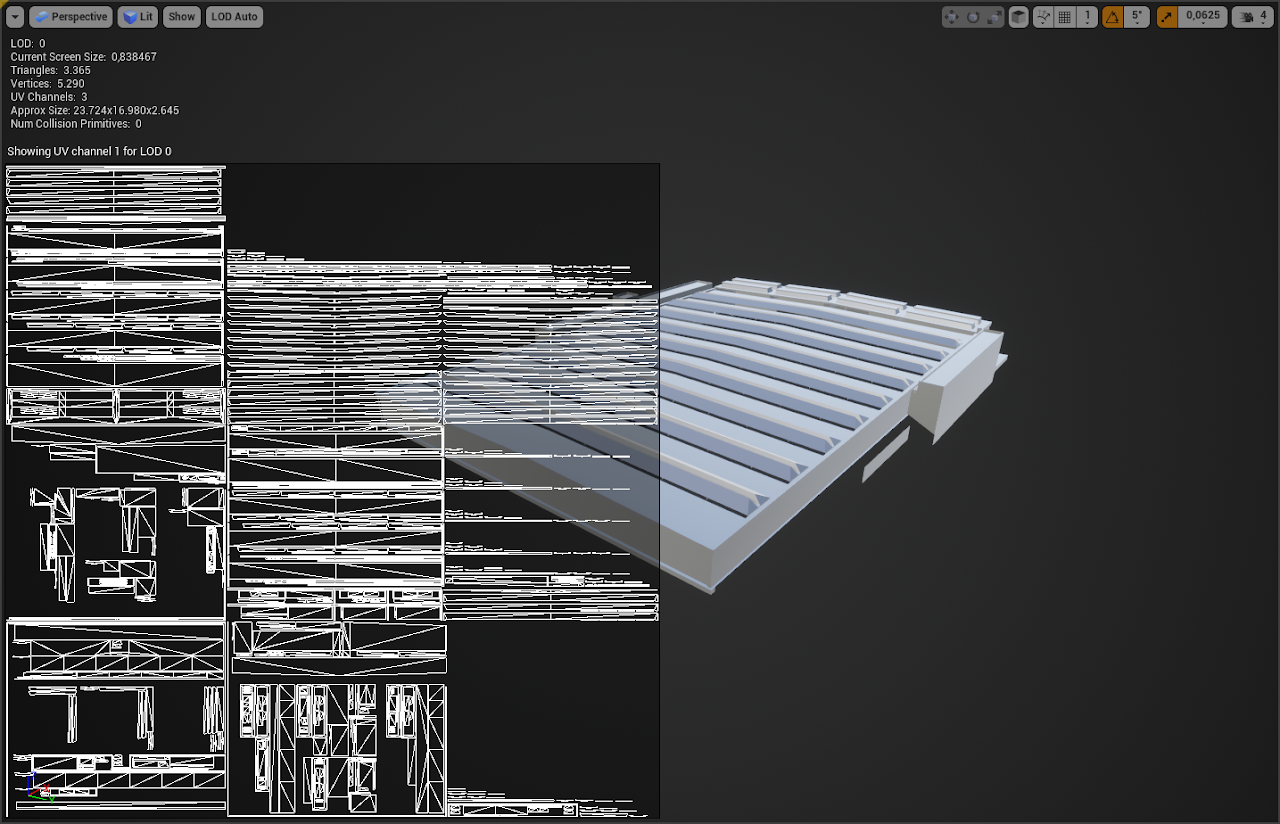
...Lightmap UVs should never overlap or go outside of U or V 1 (but like I said, DTG modelers drunk, they sometimes do that)
¶ Actually doing it
¶ Step 1
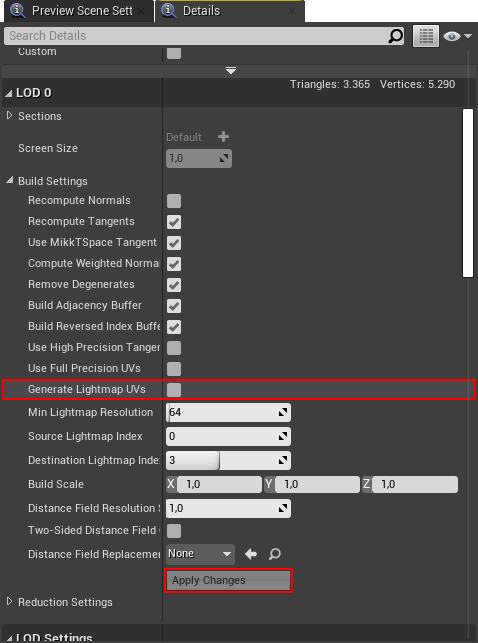
Turn off "Generate Lightmap UVs" and hit "Apply Changes"
¶ Step 2
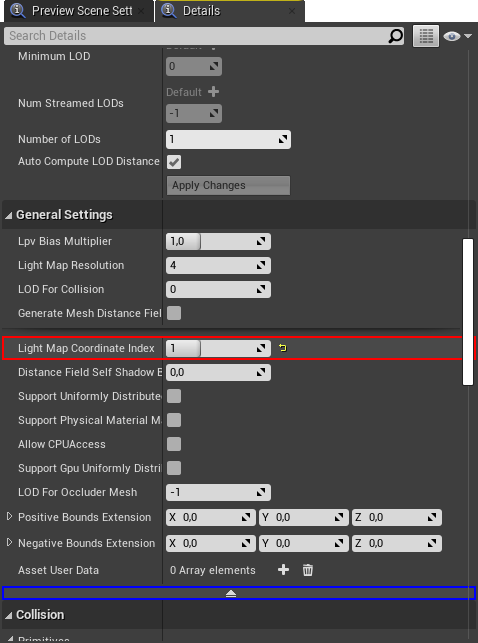
Set the "Light Map Coordinate Index" to the UV index of the lightmap (don't forget to show advanced settings of the "General Settings section")